Upgrading My Smart Growth Chart with RFID, LEDs, a Camera, and More!
2025-03-21 | By Zach Hipps
License: See Original Project Camera Displays Imaging LCD / TFT LEDs / Discrete / Modules
Let's dive back into the saga of my over-engineered growth chart. If you recall from part one, I definitively established my height as a solid 5'10". It turns out I could've been rounding up this whole time! The original chart was, let's be honest, a bit… bare bones. We needed to inject some Byte Sized Engineering bells & whistles. I want to add RGB LEDs, a receipt printer, and, most importantly, a camera to send those adorable growth updates to Grandma and Grandpa.
This isn't just for me; it's also for the kiddos, and they definitely don't share my "lofty" 5'10" stature, so we need to have a way to differentiate who is being measured. My first idea was to use buttons, but I would only have enough buttons to measure three people. That won’t cut it. Next, I thought about using RFID tags, and I found some RFID cards similar to the kind they use for hotel rooms, but it felt a bit corporate. My kids aren't checking into a conference; they're growing! Then, I found some colorful keychain RFID tags, which were way more fun but not exactly what I was looking for. Finally, I discovered RFID bracelets. Colorful, fun, and kid-friendly. Perfect! However, my existing microcontroller couldn't read them. I would have to swap to another!
Enter the M5Stack Dial. It has the same ESP32 guts but with a built-in RFID reader. Of course, this meant tearing down everything I'd already built. Classic engineering, right? Thankfully, the code transferred over with only a few minor tweaks. I changed some code for the different display and swapped around some GPIO pin declarations. Naturally, I whipped out my DIY portable soldering station. Now, with a test twist of the rotary encoder, the height displayed on the screen is changing again. This microcontroller swap was a success.
The M5Stack Dial's real magic is its ability to read the RFID bracelets and display names on the screen. Each bracelet has a unique ID, which I mapped to a name in the software. Now, I can scan the blue bracelet, and then "Zach" pops up. Next up is the red bracelet, which is "Patrick" (our camera operator). Last up is the orange bracelet, and boom, it’s "Bob" (the producer). User identification has been sorted.
Time for RGB LEDs. My plan is to have a vibrant rainbow light show along the aluminum extrusion as the carriage moves up and down but running wires that need to move up and down would be tricky. Not the solution I am looking for. I think a second stationary microcontroller to control the LEDs would be a better fit. This also opens the door for the addition of a thermal printer and camera. For the second microcontroller, I explored ESP32 camera modules and the M5Stack Timer X. Ultimately, I landed on a Raspberry Pi 5. Why? For its processing power, ample GPIO pins, top-notch camera modules, and ease of use. I know, I know, using a single-board computer when a microcontroller could technically do the job… Sacrilege! But after wrestling with those ESP32 modules, the Raspberry Pi was a breath of fresh air. Plug and play, baby! Programming the RGB strip to the Pi was not as easy as I expected. Many libraries are tailored for older Pi models. After some searching, I found a semi-updated Adafruit library that worked with my Pi 5. After testing various rainbow animations, I settled on a simple, elegant one. Nothing too flashy, just a smooth, dynamic rainbow display. Next, I wanted to figure out how to make a varying animation length based on the measured height. This was way outside my comfort zone. Python scripts & HTTP requests? I'm more of a PCB and circuit guy. Let's just say ChatGPT and I became very well acquainted. After some debugging (and a tweaked HTTP request), it worked! Spinning the dial adjusted the length of the LED animation in real-time. Pure magic. I swear I have no business making something this cool.
With the LED animations sorted, it was time to extend the length of the LED strip. To ensure a clean transition, I trimmed off the first LED and the connector on the end and the beginning of two strips. Then, after a quick solder job and a test run, we were back in business—and, of course, a quick "5'10" check for good measure.
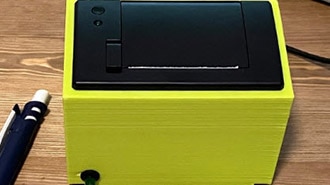
After talking to my daughter one night, she dropped an idea I couldn’t pass up. "It's going to print out a piece of paper with my height, right?" Such a great idea, and I couldn’t let her down, so a receipt printer was added to the project. Surprisingly, the printer I got had a USB connection, so I plugged it into the Raspberry Pi, looked up a Python library for it, and it worked on the first try. That was smooth. A rare win!
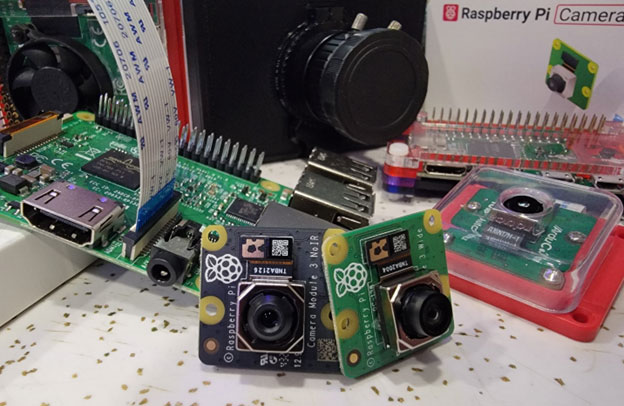
Finally, it was time to add the camera, the heart of this project. Capturing those precious growth moments for Grandma and Grandpa, who live on the other side of the country. I opted for the Raspberry Pi Camera Module 3. After doing some tests with a quick test Python script, I successfully got a test photo from the camera (don't judge my dorky self)!
But… I couldn't resist a little scope creep. I needed to add a Raspberry Pi touchscreen display. This would be perfect for a preview before snapping a photo. How else would we know when it was going to take the picture? I designed a 3D-printed enclosure, and now I have a smartphone-like selfie experience.
I reassembled all the upgrades and additions together, and it was time for the grand reveal. I gathered the kids, called Grandpa, and… well, you'll have to watch the video to see their reactions. Let's just say there were smiles, receipts, and a whole lot of heartwarming moments.
This project was a rollercoaster. From RFID bracelets to Python scripts, it pushed me way out of my comfort zone. Even though we live on opposite sides of the country this project helped close the physical gap, and bring my kids and me closer to my parents. And who knows, maybe I'll even add a laser show next time. Just kidding… mostly.


